| Info |
|---|
Videos for Confluence currently supports the storage of videos on a dedicated file system (local or mounted to the Confluence instances) or in an S3 bucket on Amazon Web Services (AWS). More cloud options are on our roadmap! Reach out to us via our Service Desk if you are interested in other storage options. |
Before you begin
You must log in to your Confluence instance with global system administrator permission to be able to carry out the following steps.
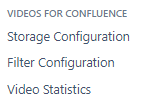
Once the app is installed, it will add menu items to the admin section. Switch to the Confluence global administration by clicking on the cog icon ![]() on the top right of the header bar.
on the top right of the header bar.
Which storage type to choose?
The choice of storage type is an important one. While it is possible to change the storage type later on, every change will require manual effort to migrate existing videos.
| Info |
|---|
You can change your configuration settings. For new videos, the new settings will be applied without further ado. For existing videos a (manual) migration may become necessary. Contact us for any additional questions you may have! |
Your choice of the storage type may be influenced by several factors like storage capacity on your local file system or general access to AWS from your corporate network.
Local file system
If you are running your Confluence datacenter instance on on-premise infrastructure, a dedicated local file system may be the obvious choice. Simply provide a separate NFS, mount it to the servers (similar to the shared home directory) and use it for videos. Any internal pricing for this additional file system and its consumption might apply.
S3 bucket on AWS
If your organization is inclined to use cloud infrastructure, you may want to consider AWS as your storage type for videos.
| Tip |
|---|
The AWS S3 bucket storage type can be used both with Confluence on on-premise infrastructure and with Confluence running on cloud infrastructure. It requires Internet access to be available for your Confluence servers (e.g. via an outbound proxy) as well as for the client devices (in order to be able to watch videos, cf. How does streaming from an AWS S3 bucket work?). |
The prerequisites to use this storage type also include an active AWS account, and the ability to set up a new or to use an existing S3 bucket. Using AWS S3 will come with extra cost, depending on AWS pricing and your consumption. On the other hand, using the built-in backup mechanisms may be easier than setting something up for your local file system.
Storage configuration
Start things off by hitting the button Start your configuration.
Storage: local file system
Storage: AWS
On Main Configuration give a name for your storage and select “Local file system”.
On Main Configuration give a name for your storage and select “AWS”.
Enter the base path to the local file system:
for Linux: e.g. /nfs/videos
for Windows: e.g. X:/videos
| Note |
|---|
Make sure that the Confluence user account on the operating system has read and write access on the selected file system and folder. For datacenter installations, also make sure that all nodes have access to the file system under the same mount path. |
Enter the ID and the access key for the AWS account in which the S3 bucket to be used is located.
| Info |
|---|
To generate the access key in AWS go to Identity and Access Management (IAM) and select the item Users. Create or choose a user with the policy Amazon S3 Full Access. Go to Access Keys and hit Create Access Key. |
Either select an existing S3 bucket or hit the button Create Bucket in order to set up a new bucket in the connected AWS account.
| Note |
|---|
If you select an existing S3 bucket, please note that you need to adjust CORS settings in AWS. Hit the button Configure CORS, once the storage setup has been completed. More details. |
Click on the Verify button to make sure that Confluence is able to use the selected file system and folder. For testing purposes a text file will be uploaded to the folder.
Upon successful verification, click Save.
| Tip |
|---|
You are ready to go! |
